Whipped cream, with its light, airy texture and sweet, creamy flavor, serves as the perfect accompaniment to a myriad of desserts, from pies and cakes to coffees and hot chocolates. While the convenience of store-bought whipped cream might tempt many, the art of making whipped cream from scratch is not only simple but also remarkably rewarding.
The homemade version offers a purity of taste and texture that far surpasses its canned counterpart, allowing for customization in sweetness and flavor that can elevate any dessert. This guide will walk you through the steps to create the perfect whipped cream from scratch, offering tips and variations to enhance your culinary repertoire.
Ingredients and Tools
To begin, you will need only a few essential ingredients and tools. If you have a whipped cream dispenser and a Fast Gas cream charger, you can skip the mixing and whipping by just combining the ingredients in the gun, attaching the cartridge, and firing away. The simplicity of the ingredients list is one of the joys of making whipped cream from scratch. If you don’t have a whipped cream dispenser, here’s a quick way to make it at home with a whisk or electric mixer.
Ingredients:
- 1 cup (240ml) of heavy cream (also known as heavy whipping cream)
- 1-2 tablespoons of sugar, to taste (granulated or confectioners’ sugar)
- ½ teaspoon of vanilla extract (optional, for added flavor)
Tools:
- A large, chilled mixing bowl
- A whisk or an electric mixer
- Measuring cups and spoons
Step-by-Step Guide
1. Chill Your Tools and Ingredients
The secret to achieving perfectly whipped cream lies in the temperature. Begin by chilling your mixing bowl and whisk or beaters in the refrigerator for at least 15 minutes. Cold tools help keep the cream cool during the whipping process, which is essential for creating those soft, billowy peaks. Ensure your heavy cream is also well-chilled; this makes it easier to whip and stabilizes the air bubbles you’re about to create.
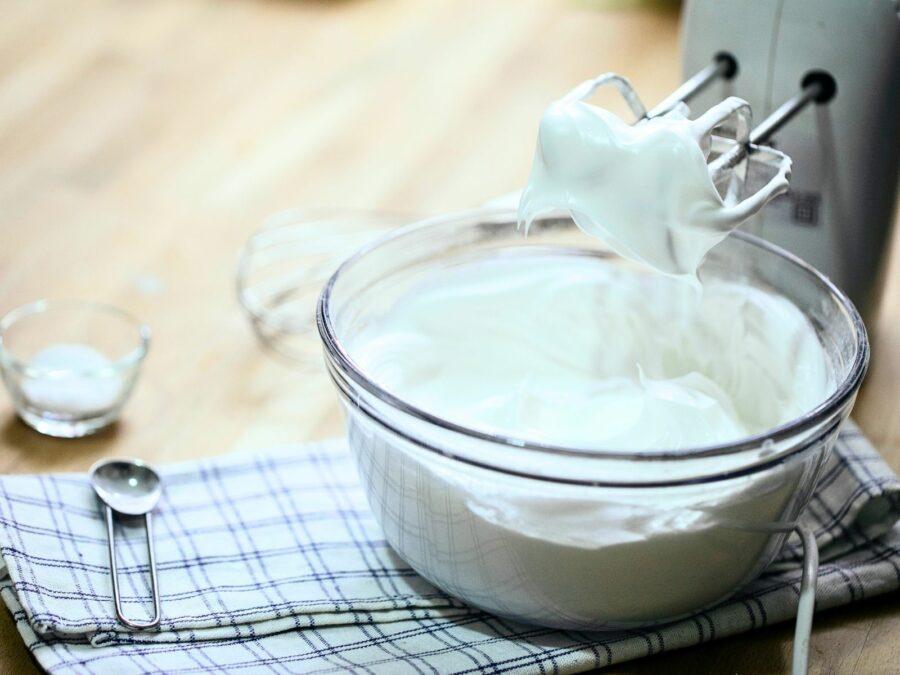
2. Begin Whipping the Cream
Pour the chilled heavy cream into your chilled bowl. Start whipping at a low speed if using an electric mixer, gradually increasing to medium-high as the cream starts to thicken. If you’re using a whisk, prepare for a good arm workout—whisk vigorously in a circular motion. The goal is to incorporate air into the cream, which gives it that delightful fluffy texture.
3. Add Sugar and Vanilla
Once the cream starts to thicken and soft peaks begin to form (when you lift your whisk or beaters, the peaks should hold their shape but with a tip that flops over), it’s time to add the sugar and vanilla extract. Continue to whip the mixture, but be cautious not to overdo it. Over-whipping can quickly turn your cream into butter.
4. Watch for Stiff Peaks
Keep an eye out for stiff peaks – this is when the whipped cream is done. The peaks should stand up firmly when you lift your whisk or beaters. The texture should be smooth, not grainy or buttery. If you’re unsure, it’s better to stop early than over-whip. Over-whipping isn’t impossible to come back from, but it can be difficult and result in wasted ingredients. If you do overwhip, simply pour in some heavy cream slowly and fold it in to hopefully get back to stiff peaks.
5. Serve or Store
Your homemade whipped cream is now ready to serve. It’s best used immediately, but you can also store it in the refrigerator for up to 24 hours. If it starts to separate, a quick whisk will bring it back to life.
Tips for Perfect Whipped Cream Every Time
- Experiment with Sugar: While granulated sugar is standard, confectioners’ sugar dissolves more easily and can produce a smoother texture. You can adjust the sweetness according to your taste.
- Flavor Variations: Vanilla extract adds a classic flavor, but don’t stop there. Experiment with other extracts like almond, peppermint, or even citrus zest to complement your desserts.
- Dairy-Free Options: For a dairy-free alternative, coconut cream (the solid part of a can of full-fat coconut milk) can be chilled and whipped much like heavy cream, offering a delicious vegan option.
- Keep Everything Cold: The colder your ingredients and tools, the better. This helps maintain the structure of the whipped cream and makes the whipping process easier.
Conclusion
Making whipped cream from scratch is a simple yet satisfying process that can add a touch of elegance and decadence to any dessert. With minimal ingredients and a bit of elbow grease (or the help of an electric mixer), you can create a lusciously smooth, perfectly sweetened topping that far surpasses any store-bought alternative.
By following the steps outlined above and experimenting with flavors and sweetness levels, you’ll be able to tailor your whipped cream to suit any dessert or occasion. Remember, the key to perfect whipped cream lies in the chill of your ingredients and the care in your whipping; master these, and you’ll have a foolproof addition to your culinary skills.